How to install the FSLogix Apps agent
With this article I want to provide an overview on how I usually install the FSlogix Apps agent. The FSLogix Apps agent enables the use of the Profile Container, Office Container, App Masking and Java Redirection features.
This is by no means a “best-practices guide” however it does contain a few registry tweaks and workarounds that I have collected, and implemented, in a wide range of customer setups. This guide mainly focuses on the Profile Container and Office Container features, as the App Masking and Java Redirection usually do not need tweaks and/or workarounds, they just work.
I have been working with FSLogix for the better part of 5 years now, so I thought it might be time for me to both share a bit and also document the FSLogix Agent install process I have come to use over the years.
Table of Contents
Get the FSLogix Apps agent installer
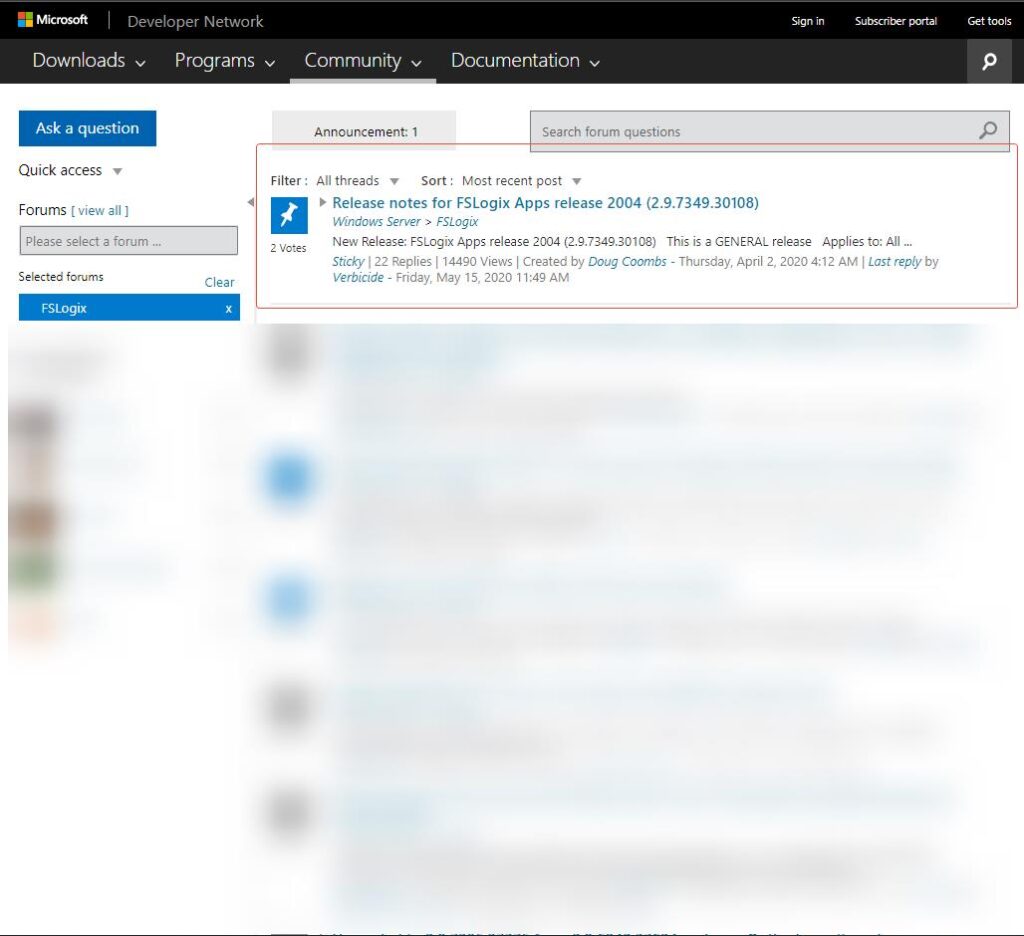
The first thing you need to do is to get the latest version of the FSLogix Apps agent, which can be found here:
https://social.msdn.microsoft.com/Forums/en-us/home?forum=FSLogix
Here you’ll most likely find the latest version of FSLogix Apps pinned to the top of the page in a “release notes” article:
Following the release notes link takes you to a new page, which contains a download link along with the release notes for the particular release:
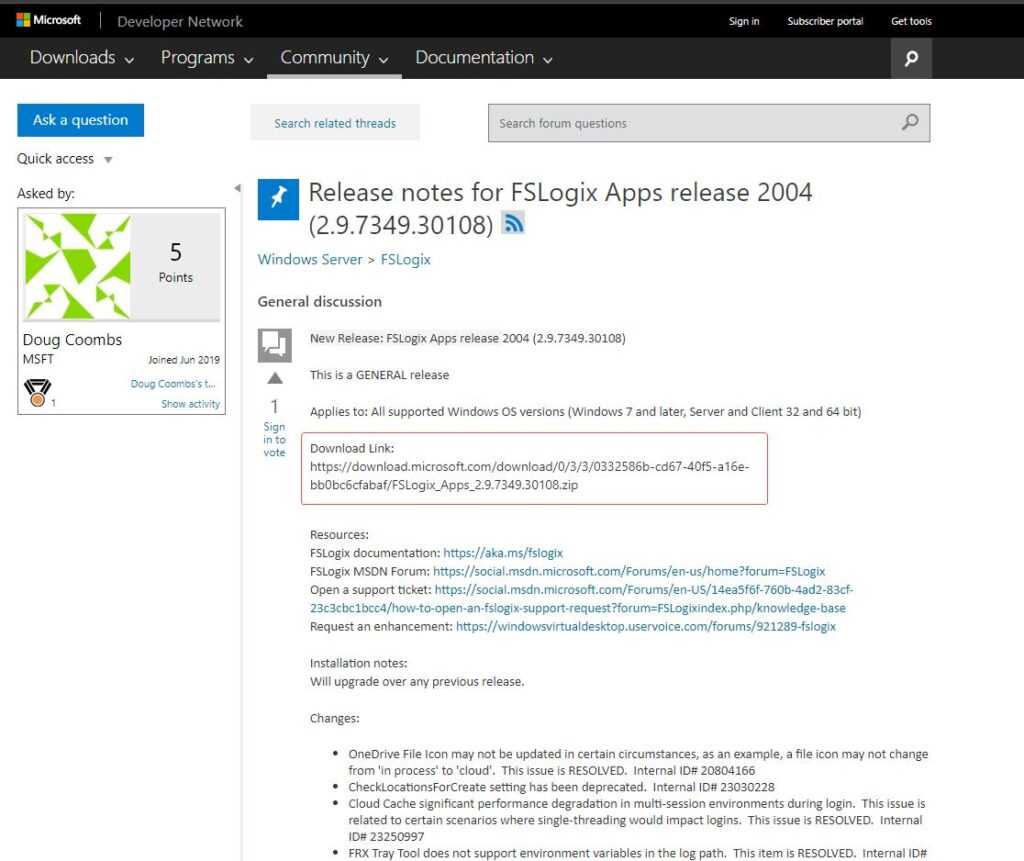
If you just want the bits, here is a direct download link for the latest FSLogix Apps 2004 (2.9.7379.30108):
https://download.microsoft.com/download/0/3/3/0332586b-cd67-40f5-a16e-bb0bc6cfabaf/FSLogix_Apps_2.9.7349.30108.zip
I do however always recommend going through the release notes to see what has been changed/fixed!
Installing the FSLogix Apps agent
Once downloaded, you’ll need to extract the ZIP file which should provide you with the following contents:
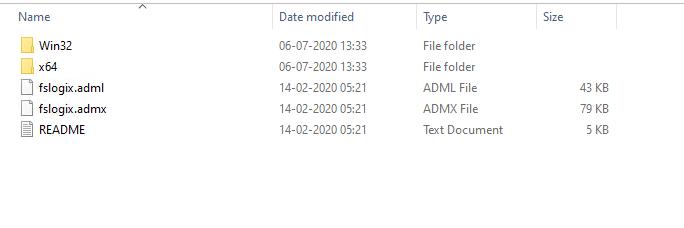
In the x64 there is a release subfolder which contains 3 different setup files:
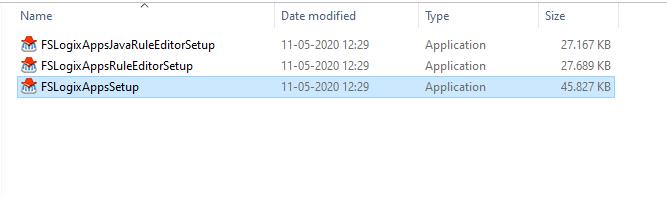
The one needed to install the FSLogix App agent, is the FSLogixAppsSetup.exe file.
The very simple manual install process looks like this:

If you want to change the install directory, click Options and specify the path, otherwise just click install. This will install the FSLogix Apps agent to the default folder which is %ProgramFiles%\FSLogix\Apps:

Besides installing itself to the %ProgramFiles%\FSLogix\Apps folder, the FSLogix Apps agent setup also creates 4 local groups:

As the description text says, these groups control who will be included (FSLogix Profile/Office Container should apply) or excluded (FSLogix Profile/Office Container should not apply). I’ll cover how these groups can be used in the next section.
FSLogix Apps agent post-install modifications
Now that the FSLogix Apps agent is installed, we have to do a range of different modifications.
Local Group modifications
The first thing we need to do is to remove the Everyone group from the FSLogix Profile Include List and FSLogix ODFC Include List groups:
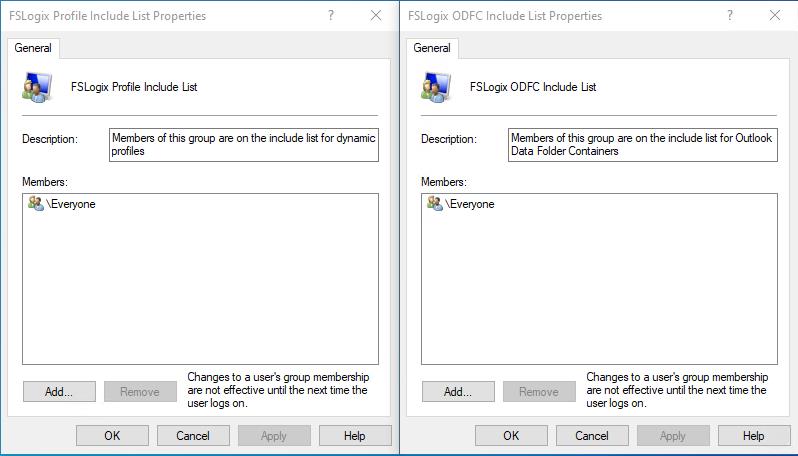
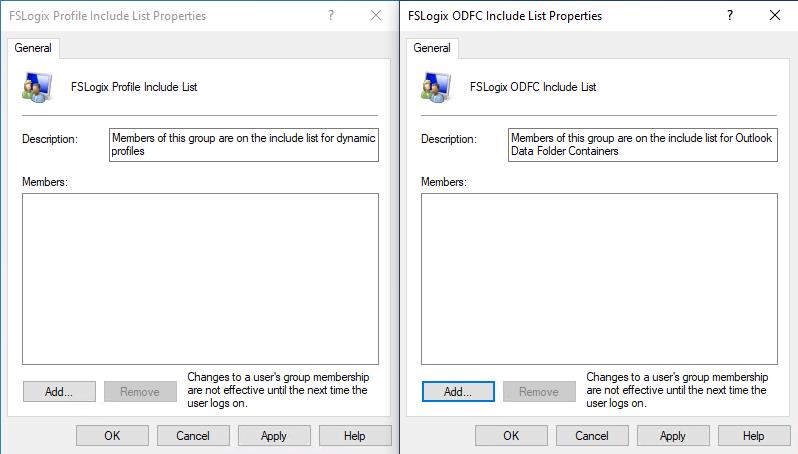
The reason for this, is that we want to have more control over who get’s an FSLogix Container. If the Everyone group is not removed, any users logging on will get an FSLogix Container including administrative accounts, that is sometimes not desirable. You can populate these groups with Group Policy Preferences, scripts or simply bake it in the image. I always use Group Policy Preferences to populate both the includes group and the exclude groups, if needed.
Registry modifications
The second thing we need to do is to apply a few registry modifications. As with any other modifications, you will of course have to do some testing, to make sure they work as expected in your environment.
RoamSearch:
This registry value enables the Windows Search Index roaming feature in FSLogix. This value has to be configured during setup, to make sure that Windows Search roaming is working properly. More on that in the “Install sequence” section later on.
The registry value can be found here:
HKEY_LOCAL_MACHINE\SOFTWARE\FSLogix\Apps
RoamSearch=1, 2 or 0 (DWORD value)
1=Single-user search (Primarily to be used on VDIs)
2=Multi-user search (To be used on Session Hosts with multiple users)
0=Disabled (The default value)
Be aware that with Windows Server 2019 and Windows 10 Multi-User Microsoft no longer recommends to use FSLogix for Windows Search Index roaming, as it is now a part of the user’s profile and not machine-based like in earlier versions of Windows. However the built in Windows Search Index roaming is currently not working in either Windows Server 2019 or Windows 10 multi-user, so if you need that feature you will have to implement a workaround. I have described a couple of workarounds later in this article, one which contain an exception to Microsofts recommendations, great stuff.
CoreCount:
This registry value is not directly related to the FSLogix Apps Agent, it is however still relevant. Whether to configure it or not is still debatable, I do configure it though.
The registry value can be found here:
HKEY_LOCAL_MACHINE\SOFTWARE\Microsoft\Windows Search
CoreCount=1 (DWORD value)
The CoreCount registry value limits the Windows Search service to 1 CPU core at all times. Back in the Windows Server 2012/2012R2 days, this registry value was needed to prevent Windows Search Index corruptions or bloating.
The indexing will take longer because of the limitation, if you have plenty of CPU capacity, then consider not configuring this registry value, as it may improve the indexing performance.
Install sequence
The correct install sequence is important if you want to make sure that the Windows Search Index roaming feature is working properly in a user session.
A quick brush up on Windows Search Index roaming. If you are going to use Outlook in “Cached Exchange Mode” (Microsoft recommends Cached Exchange Mode with Office 365) an OST file will be created, either in the Profile Container or the Office Container. This OST file has to be indexed in order to deliver fast search results in Outlook.
This is the install/configure sequence I always use:
- Configure the Windows Search service to automatic startup (not delayed startup) and start the service
- Reboot
- Install Office
- Reboot
- Install FSLogix Apps Agent + modifications
- Reboot
The configuration of the Windows Search service is only needed in Windows Server operating systems, as the service is enabled by default in Windows 10. The service needs to be running before installing Office, otherwise Office might not integrate itself with Windows Search and the indexing of OST files will not work properly.
I use this approach even if Windows Search Index roaming is not needed, it’s always nice to have the possibility of enabling it later on.
If Windows Search Index roaming is not needed you should disable the Windows Search service to conserve CPU resources, but do it after you have installed both Office and the FSLogix Apps agent, then you should be able to enable it if/when the need occurs.
Windows Search Roaming workarounds
You will have to implement a workaround, if you want Windows Search Index roaming to work properly in Windows Server 2019 and Windows 10 Multi-User.
Workaround 1
The first workaround, I call it the “EventID 2 workaround”, is covered by James Kindon on his blog. If you follow Microsofts recommendations, you need to let Windows roam the search index, which is in the user’s profile here – AppData\Roaming\Microsoft\Search. However, as mentioned earlier, the user-based roaming feature is broken, it simply does not work and once a single user’s index is broken, it takes down the entire Windows Search feature affecting all other users, and the only way to get it running again is to restart the Windows Search service. Some time during the process of breaking itself, the Windows Search feature logs an event with an ID of 2, the “Event ID 2 workaround” simply restarts the Windows Search service, whenever an event ID 2 is logged, which should be almost every time a user logs off.
Workaround 2
The second workaround is probably not know by many, and it is not supported by Microsoft.
I actually discovered the workaround in a Citrix article about the defunct Citrix Profile Management and started testing it in my lab. The preliminary results show a more stable Windows Search index process and most importantly no more corruption. Interestingly enough Citrix has also mentioned the registry change in the official Citrix Profile Management documentation where they state that you have to configure this registry value, to make the search index feature work in Windows Server 2019 and Windows 10 1809 and later, interesting. My guess is that this registry change makes the Windows Search index feature revert back to being machine-based, and not user-based, which enables us to roam the search index using FSLogix, however we will then have to go against Microsofts recommendations and enable the Window Search roaming in the FSLogix Apps agent.
Which ever method you choose, you will of course still have to do some proper testing in your own environment, to determine which solution best suits your needs.
Automated install and configuration
I am a very big fan of automation, and I try to automate as much as possible. Even though the FSLogix Apps agent install proces isn’t that difficult, we still have a few post-install customizations. If we want to deliver a uniform way of installing the FSLogix Apps agent and applying the post-install customizations, we need to automate the installation and additional customization configurations.
Here is how I usually install and configure the FSLogix Apps agent and the Windows Search service.
Windows Search service configuration
# Configure Windows Search service auto-start
$ServiceName = "WSearch"
$Service = Get-Service -Name $ServiceName
If (($Service).StartType -eq "Disabled")
{
    Set-Service -Name $ServiceName -StartupType Automatic -Verbose

        If (($Service).Status -eq "Stopped")
        {
            Start-Service -Name $ServiceName -Verbose

            # Disable Delayed Auto Start
            Set-ItemProperty -Path "HKLM:SYSTEM\CurrentControlSet\Services\WSearch" -Name "DelayedAutoStart" -Value "0" -Verbose
        }
}
FSLogix Apps Agent installation and configuration
# Define variables
$AgentInstaller = "FSLogixAppsSetup.exe"
$Switches = "/install /quiet /norestart"
$OS = (Get-WmiObject Win32_OperatingSystem).Caption

# Install the FSLogix Apps agent
Start-Process -Wait ".\$AgentInstaller" -ArgumentList $Switches

# Windows Search CoreCount modification
If (!(Get-ItemProperty -Path "HKLM:SOFTWARE\Microsoft\Windows Search" -Name "CoreCount" -ErrorAction SilentlyContinue))
{
    Write-Output "Windows Search registry fix" -Verbose
    New-ItemProperty -Path "HKLM:SOFTWARE\Microsoft\Windows Search" -Name "CoreCount" -Value "1" -Type DWORD -Verbose
}
    else
    {
        Write-Output "Windows Search registry fix exists" -Verbose
    }

# Enable FSLogix Apps agent search roaming - Apply different configurations based on operating system
If (!(Get-ItemProperty -Path "HKLM:SOFTWARE\FSLogix\Apps" -Name "RoamSearch" -ErrorAction SilentlyContinue))
{
If ($OS -Like "*Windows Server 2016*")
{
    New-ItemProperty -Path "HKLM:SOFTWARE\FSLogix\Apps" -Name "RoamSearch" -Value "2" -Type DWORD -Verbose
}
        If ($OS -Like "*Windows Server 2019*" -or $OS -eq "Microsoft Windows 10 Enterprise for Virtual Desktops")
        {
            New-ItemProperty -Path "HKLM:SOFTWARE\FSLogix\Apps" -Name "RoamSearch" -Value "0" -Type DWORD -Verbose
        }
            If ($OS -Like "*Windows 10*" -and $OS -ne "Microsoft Windows 10 Enterprise for Virtual Desktops")
            {
                New-ItemProperty -Path "HKLM:SOFTWARE\FSLogix\Apps" -Name "RoamSearch" -Value "1" -Type DWORD -Verbose
            }
                else
                {
                    Write-Output "FSLogix Search Roaming enabled" -Verbose
                }
}
Depending on the workaround you choose, remember to adjust the RoamSearch value accordingly.
If you go with workaround 1, RoamSearch should be configured to 0. If you go with workaround 2, it should be 1 if using VDIs and 2 if using Session Hosts.
Windows Search Roaming workaround 1
Automating this workaround is not pretty, as PowerShell doesn’t natively support event based triggers. However my Google-fu is strong, and I managed to find an article describing how to create a scheduled task with an event based trigger, using only Powershell.
Credit for this solution goes out to – https://xplantefeve.io/posts/SchdTskOnEvent
# Define CIM object variables
# This is needed for accessing the non-default trigger settings when creating a schedule task using Powershell
$Class = cimclass MSFT_TaskEventTrigger root/Microsoft/Windows/TaskScheduler
$Trigger = $class | New-CimInstance -ClientOnly
$Trigger.Enabled = $true
$Trigger.Subscription = "<QueryList><Query Id=`"0`" Path=`"Application`"><Select Path=`"Application`">*[System[Provider[@Name='Microsoft-Windows-Search-ProfileNotify'] and EventID=2]]</Select></Query></QueryList>"

# Define additional variables containing scheduled task action and scheduled task principal
$A = New-ScheduledTaskAction –Execute powershell.exe -Argument "Restart-Service Wsearch"
$P = New-ScheduledTaskPrincipal -UserId "NT AUTHORITY\SYSTEM" -LogonType ServiceAccount
$S = New-ScheduledTaskSettingsSet

# Cook it all up and create the scheduled task
$RegSchTaskParameters = @{
    TaskName    = "Restart Windows Search Service on Event ID 2"
    Description = "Restarts the Windows Search service on event ID 2"
    TaskPath    = "\"
    Action      = $A
    Principal   = $P
    Settings    = $S
    Trigger     = $Trigger
}

Register-ScheduledTask @RegSchTaskParameters
Windows Search Roaming workaround 2
This workaround is very easy to implement, compared to workaround 1. As it’s basically only a registry value we need to write/change, this is really easy to do via Powershell.
# Check if registry value exist.
# If registry value exists configure value data to 0, otherwise create registry value
If (!(Get-ItemProperty -Path "HKLM:SOFTWARE\Microsoft\Windows Search" -Name "EnablePerUserCatalog" -ErrorAction SilentlyContinue))
{
    New-ItemProperty -Path "HKLM:SOFTWARE\Microsoft\Windows Search" -Name "EnablePerUserCatalog" -Value 0 -PropertyType "DWORD" -Verbose
}
    else
    {
        Set-ItemProperty -Path "HKLM:SOFTWARE\Microsoft\Windows Search" -Name "EnablePerUserCatalog" -Value 0 -Verbose
    }
This concludes the article. If you have any comments or questions feel free to reach out to me on Twitter or in the World of EUC Slack channel.